
Technical Root Cause & Diagnostics
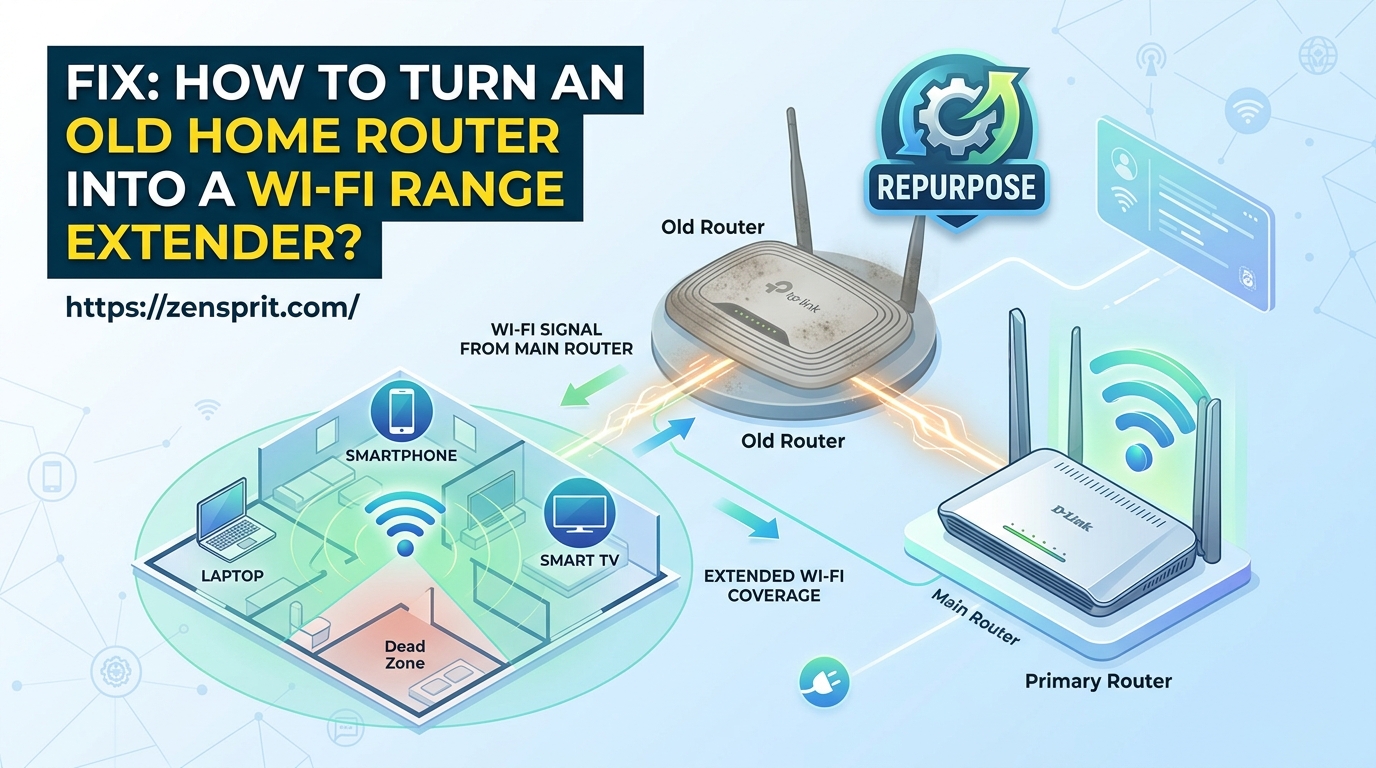
An old router can sometimes extend an existing Wi-Fi network, but it must support a suitable operating mode such as Repeater, Range Extender, WDS, Wireless Bridge, or Access Point. The exact feature depends on the router’s firmware and model. Simply changing the old router’s Wi-Fi name does not make it an extender.
I usually start by checking whether the old router can work wirelessly with the main router. If it cannot, an Ethernet cable can turn it into a reliable wired access point, which is often faster and more stable than wireless repeating.
Common problems include:
- The old router cannot see the main Wi-Fi network.
- Devices connect to the old router but have no internet.
- The extender creates a second network but clients cannot communicate correctly.
- Both routers use the same LAN IP address.
- DHCP from both routers causes conflicting IP addresses.
- The extended connection is extremely slow.
- The router supports WDS only on certain wireless bands or security modes.
Pre-Flight Sanity Checks (Rule Out the Basics)
1. Find the exact model and firmware
Check the label underneath the old router for its model number and hardware revision.
A feature available on one hardware revision may not exist on another.
[IMAGE PLACEHOLDER: Old router label showing the exact model number and hardware revision]
2. Check the main router’s network address
On a Windows laptop connected to your normal Wi-Fi, open Command Prompt:
ipconfigNote the Default Gateway.
For example:
IPv4 Address:    192.168.1.105
Default Gateway: 192.168.1.1
You will need this information when configuring the second router.
3. Reset the old router if its previous configuration is unknown
If the old router was previously used on another network, perform a factory reset according to its manufacturer’s instructions.
This prevents old DHCP, WAN, Wi-Fi, or LAN settings from interfering with the new configuration.
Method 1: Use the Old Router’s Built-In Repeater or WDS Mode
If the old router specifically supports Repeater, WDS, Wireless Bridge, or Range Extender mode, this is the simplest wireless approach.
Connect a computer to the old router using Ethernet or its temporary Wi-Fi network.
Open its administration page. Common router interfaces use an address such as:
192.168.0.1or:
192.168.1.1The correct address depends on the router.
Look under menus such as:
Wireless → Wireless Settings
or:
Advanced → Operation Mode
Look for:
- Repeater
- Range Extender
- WDS
- Wireless Bridge
- Universal Repeater
Select the appropriate mode and scan for nearby wireless networks.
Choose your main router’s Wi-Fi network and enter its Wi-Fi password.

Some routers require you to manually enter the main router’s wireless MAC address. Others automatically discover it.
Configure the extended Wi-Fi network according to the router’s instructions. If the firmware allows a separate SSID, something such as:
HomeWiFi_Extmakes troubleshooting easier.
Save the settings and allow the router to restart.
Verification: Connect a phone or laptop to the old router’s extended Wi-Fi and confirm that it receives an IP address from the main router and can open several websites.
Technical Note: WDS is not universally compatible between different router brands and firmware versions. Two routers can both advertise WDS support but still fail to establish a stable wireless bridge.
Method 2: Turn the Old Router into a Wired Access Point
If wireless repeater mode does not work, this is usually the better solution.
Instead of repeating the Wi-Fi signal wirelessly, connect the two routers with an Ethernet cable.
First, log into the old router.
Disable its DHCP Server.
This is important because the main router should remain the only device assigning IP addresses on the network.

Next, change the old router’s LAN IP address so that it does not conflict with the main router.
For example, if the main router is:
192.168.1.1you could configure the old router as:
192.168.1.2provided that address is unused and suitable for your network.
Save the setting.
The administration address of the old router will now be 192.168.1.2 in this example.
Configure its Wi-Fi name and password.
You can use the same SSID and password as the main router if you want devices to have a chance of roaming between access points, although roaming behavior depends on the client and network equipment. For easier troubleshooting, using a different SSID initially is often better.
Finally, connect:
Main Router LAN
       │
       │ Ethernet cable
       ▼
Old Router LAN
Do not use the old router’s WAN/Internet port for this basic access-point configuration unless its firmware specifically provides an access-point mode that instructs you to do so.
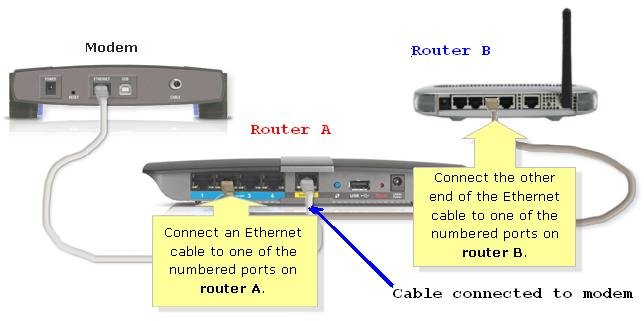
Verification: Connect a device to the old router’s Wi-Fi and confirm that its IP address, default gateway, and internet connection come from the main router.
Technical Note: The old router is now functioning as a wireless access point rather than a traditional router. That is why its DHCP server is disabled and the Ethernet connection uses the LAN side.
Method 3: Configure a Manual Wireless Bridge When Supported
Some older routers offer a Client Bridge or Wireless Bridge mode rather than a simple repeater.
This mode is useful when you want the old router to connect wirelessly to the main router while providing network access through its Ethernet ports.
Open the old router’s wireless configuration and select the bridge/client mode if available.
Enter the main Wi-Fi network’s:
- SSID
- Security mode
- Password
- Wireless band, if required
- Remote/AP MAC address, if required

Make sure the old router’s LAN IP is different from the main router’s address.
For example:
Main router: 192.168.1.1
Old router:  192.168.1.2
Disable the old router’s DHCP server if the bridge mode does not do this automatically.
After saving the configuration, connect a laptop or other Ethernet device to the old router and test network access.
If the bridge works but performance is poor, check the wireless signal strength and whether the old router is limited to an older Wi-Fi standard.
Verification: Connect a device through the old router and confirm that it receives a valid address from the main router and can communicate with both the main router and the internet.
Warning: Do not enable DHCP on both routers for the same LAN unless you deliberately understand the resulting network architecture. Two independent DHCP servers can hand out conflicting gateways and DNS settings.
Long-Term Prevention & Configuration Lock
1. Give the old router a documented management address.
Write down its LAN IP, Wi-Fi settings, and operating mode. Otherwise, finding the administration page later can become surprisingly difficult.
2. Keep the main router responsible for DHCP.
For a simple home network, one DHCP server is much easier to maintain than multiple routers independently assigning addresses.
3. Prefer Ethernet when maximum performance matters.
A wired access point avoids the wireless backhaul problem that affects many inexpensive repeaters. If you have an Ethernet cable available, the access-point configuration is usually the better long-term arrangement.
Advanced Edge-Case FAQ
1. Why does my old router extend Wi-Fi but the internet becomes much slower?
A wireless repeater has to communicate with the main router over Wi-Fi while also serving connected clients. On older single-radio equipment, this can substantially reduce usable throughput.
Distance, walls, interference, and the old router’s Wi-Fi generation can make the reduction even greater.
If performance matters, use the old router as a wired access point instead. Ethernet provides a dedicated connection between the two networking devices rather than using the same wireless link for both backhaul and client traffic.
2. Can I use the same Wi-Fi name and password on both routers?
Yes, provided both devices are configured correctly on the same LAN. Using the same SSID and password can make moving around the house more convenient.
However, simply giving two independent routers the same Wi-Fi name does not create a proper roaming system. The devices need to share the same LAN, and client devices decide when to move between access points.
For initial testing, I recommend different names such as HomeWiFi and HomeWiFi-Office. Once everything works, you can decide whether using the same SSID is worthwhile.
3. Why can I connect to the old router but cannot open its settings anymore?
This commonly happens after changing its LAN IP address.
For example, if you changed it from:
192.168.0.1to:
192.168.1.2you must use the new address to access its administration interface.
If you cannot find the new address, check the main router’s connected-device/DHCP list. If necessary, temporarily connect a computer directly to the old router and verify its network configuration.