
Target environment: Google Chrome on Windows 10/11
Chrome normally displays WebP images in their original format and may save them as .webp when you use Save image as. There is no standard Chrome setting that changes every downloaded WebP image into JPG automatically. To make the process automatic, you need to use a browser extension, an external conversion workflow, or a Windows automation method.
The right solution depends on what you actually need: converting one image when saving it, converting every WebP download automatically, or forcing a website to provide a different image format. I start by identifying which of those behaviors is required because changing Chrome’s download settings alone cannot perform image-format conversion.
Technical Root Cause & Diagnostics
WebP is an image format that Chrome supports natively. When a website sends a WebP image, Chrome can decode and display it without converting it to JPEG. The browser’s normal Save image as operation generally preserves the resource’s available format instead of performing a JPEG re-encode.
This creates a common misconception: changing the download folder, renaming .webp to .jpg, or changing Chrome’s download settings does not convert the underlying image data.
Common symptoms include:
- Right-clicking an image and choosing Save image as produces
.webp. - Renaming
photo.webptophoto.jpgdoes not make it a genuine JPEG. - An application refuses to open the downloaded WebP file.
- A website displays an image as WebP even though you need JPG.
- You want Chrome downloads to be converted without manually opening an image editor.
- A browser extension converts individual images but does not process normal downloads.
Pre-Flight Sanity Checks (Rule Out the Basics)
1. Check the actual downloaded file type
Download one image normally.
Right-click the file in File Explorer and select:
Properties
Check Type of file.
If Windows reports a WebP image, the file has not been converted simply because the filename was changed.
2. Check whether the website already offers JPG
Some websites provide multiple image formats or a download button that delivers JPEG or PNG separately.
Before adding an extension or automation tool, inspect the site’s own download options.
3. Test a single image before automating the process
Download one WebP file and convert it manually using an image application such as Paint.
If the resulting JPG opens correctly, the conversion itself works and the remaining problem is automation.
Method 1: Use a Chrome Extension That Converts Images During Download
For users who want the closest experience to “download WebP and automatically get JPG,” a dedicated Chrome extension is the simplest approach.
Open the Chrome Web Store and search for a current WebP-to-JPG conversion extension.
[IMAGE PLACEHOLDER: Google Chrome Web Store search results showing WebP-to-JPG image conversion extensions]
Before installing one, check:
- Recent update date
- User reviews
- Required permissions
- Whether it converts downloaded files or only images displayed in webpages
- Whether conversion happens locally or through an external service
- Whether JPEG quality can be selected
- Whether batch conversion is supported
After installation, open the extension’s options page from:
Chrome → Extensions → Manage Extensions → [Extension Name] → Details → Extension options
Configure the output format as JPG/JPEG if that option is available.
Some extensions provide a right-click command such as:
Right-click image → Convert/Save as JPG
Others provide a toolbar button.
[IMAGE PLACEHOLDER: Chrome Extensions page showing the installed image conversion extension and its options]
Test the extension with one WebP image rather than immediately downloading a large number of files.
Verification: A test WebP image should produce a separate .jpg or .jpeg file that opens as a JPEG in Windows Photos or another image viewer.
Technical Note: Chrome extensions cannot all intercept downloads in the same way, so an extension that converts images displayed on a page may not automatically convert every
.webpfile downloaded through Chrome.
Method 2: Use Chrome to Download WebP, Then Automate JPG Conversion in Windows
If you download many images, separating Chrome downloading from Windows conversion is usually more reliable than trying to force Chrome itself to perform the conversion.
Create a dedicated download folder, for example:
C:\WebPDownloads
Configure Chrome to use that location:
Chrome → Settings → Downloads → Location → Change
[IMAGE PLACEHOLDER: Chrome Settings Downloads page showing the configured WebP download folder]
Chrome will continue downloading the original WebP files, while an automation tool can monitor the folder and convert new files.
A simple PowerShell-based workflow can use an image-processing utility installed on Windows rather than pretending that PowerShell’s basic file commands can convert images by themselves.
For example, with ImageMagick installed, the conversion command can be structured as:
magick input.webp output.jpg
For multiple files, the workflow can process every .webp file placed in the download directory.
A practical batch command is:
magick mogrify -format jpg *.webp
However, do not run mogrify against your only copy of important images without understanding its behavior. For a safer workflow, write converted JPG files to a separate directory.
For example:
magick input.webp -quality 90 output.jpg
This preserves the original WebP while creating a JPEG copy.
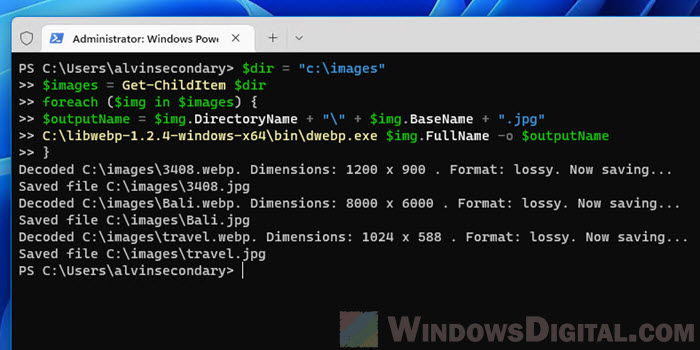
Verification: After conversion, the destination folder should contain a genuine .jpg file that Windows identifies as a JPEG image rather than merely a renamed WebP file.
Warning: JPEG is lossy and does not preserve transparency. If the original WebP contains transparent areas, converting directly to JPG requires those transparent pixels to be replaced with a background color.
Method 3: Use Chrome DevTools When You Need the Original Image URL or a Different Format
Sometimes the problem is not the downloaded file itself. The website may be deliberately serving a WebP version through its image-delivery system.
When you need to investigate the actual resource Chrome receives, open:
Chrome → More Tools → Developer Tools
or press:
Ctrl + Shift + I
Select the Network tab.
Reload the page and filter the requests using:
Img
Click the relevant image request and inspect its URL and response information.
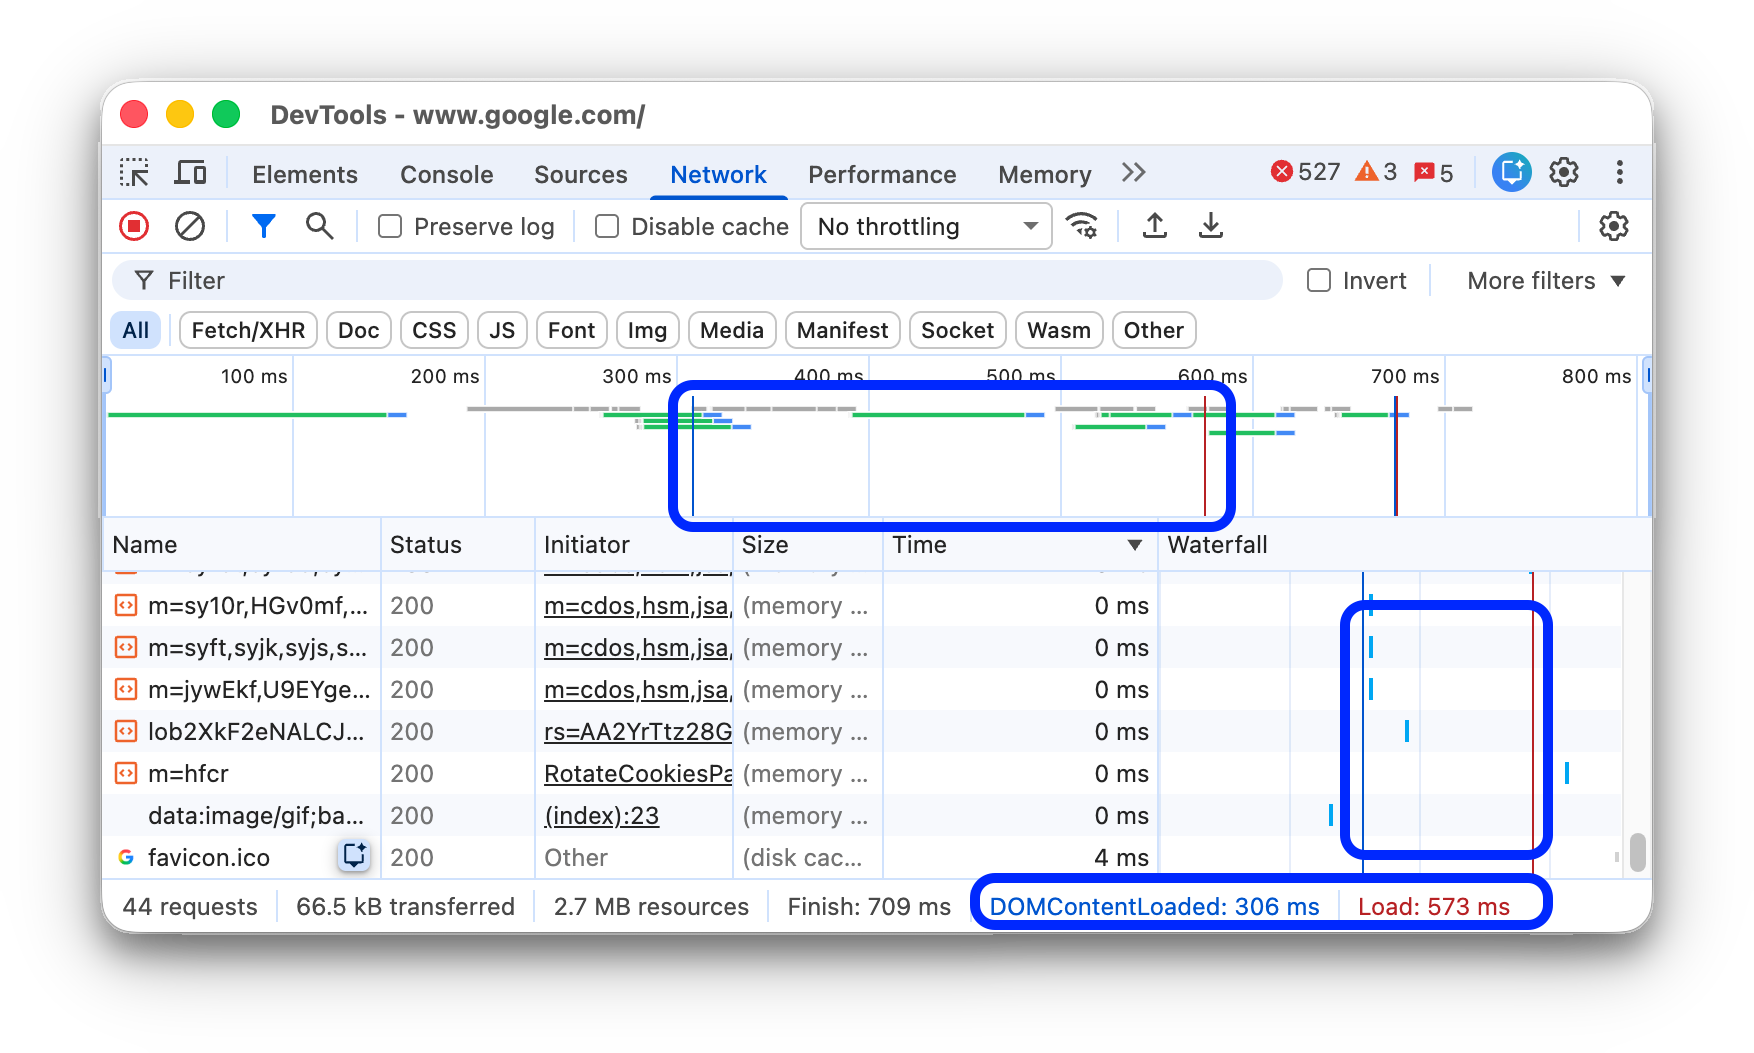
This can reveal whether the site is serving a .webp resource, using a CDN URL, or generating the image dynamically.
If the site provides a documented JPG version through its own interface, use that instead of trying to manipulate the browser.
Do not assume that changing .webp at the end of a URL to .jpg will work. Many image CDNs use URL parameters or content negotiation rather than separate filename extensions.
Verification: The Network panel should show the actual image resource Chrome receives, allowing you to determine whether a JPEG version is available before adding conversion software or extensions.
Technical Note: Some websites generate WebP dynamically from an original JPEG or another source format. In that situation, Chrome cannot simply “switch back” to the original file unless the website or CDN exposes another representation.
Long-Term Prevention & Configuration Lock
1. Keep original WebP files when image quality matters
Do not automatically delete the WebP after creating a JPG. WebP may provide smaller files while retaining good visual quality, and the original may be useful later.
2. Use a dedicated conversion folder
Keep downloaded originals separate from converted files:
WebP Downloads → Converted JPG
This prevents repeated conversion and makes it much easier to identify which files are originals.
3. Avoid blindly changing file extensions
Changing:
picture.webp
to:
picture.jpg
changes the filename, not the encoding.
A genuine conversion must decode the WebP image and encode the pixels into the JPEG format.
Advanced Edge-Case FAQ
Why does renaming WebP to JPG sometimes appear to work?
Some applications identify images by their internal file signature rather than relying entirely on the extension. That can make a renamed WebP appear to work in one application.
It is still a WebP file internally, however. Programs that strictly expect JPEG encoding may reject it. A real conversion requires re-encoding the image as JPEG.
Can Chrome be configured to save every WebP image as JPG without an extension?
Not through Chrome’s normal download settings.
Chrome’s standard settings control things such as the download location and whether Chrome asks where to save files. They do not provide a built-in global “convert WebP downloads to JPG” option.
For automatic conversion, use a suitable Chrome extension or a separate Windows automation workflow.
Why does my converted JPG have a different file size from the WebP?
WebP and JPEG use different compression methods. JPEG quality settings also directly affect the resulting file size.
For example, converting at JPEG quality 90 will generally produce a different file size from quality 70 or 100. The conversion may also remove WebP-specific features such as transparency.
For photographs, a quality setting around the high 80s or low 90s is often a reasonable starting point, but the correct setting depends on the image and your intended use.